You want to be a hooker? Excellent!
What you'll need:
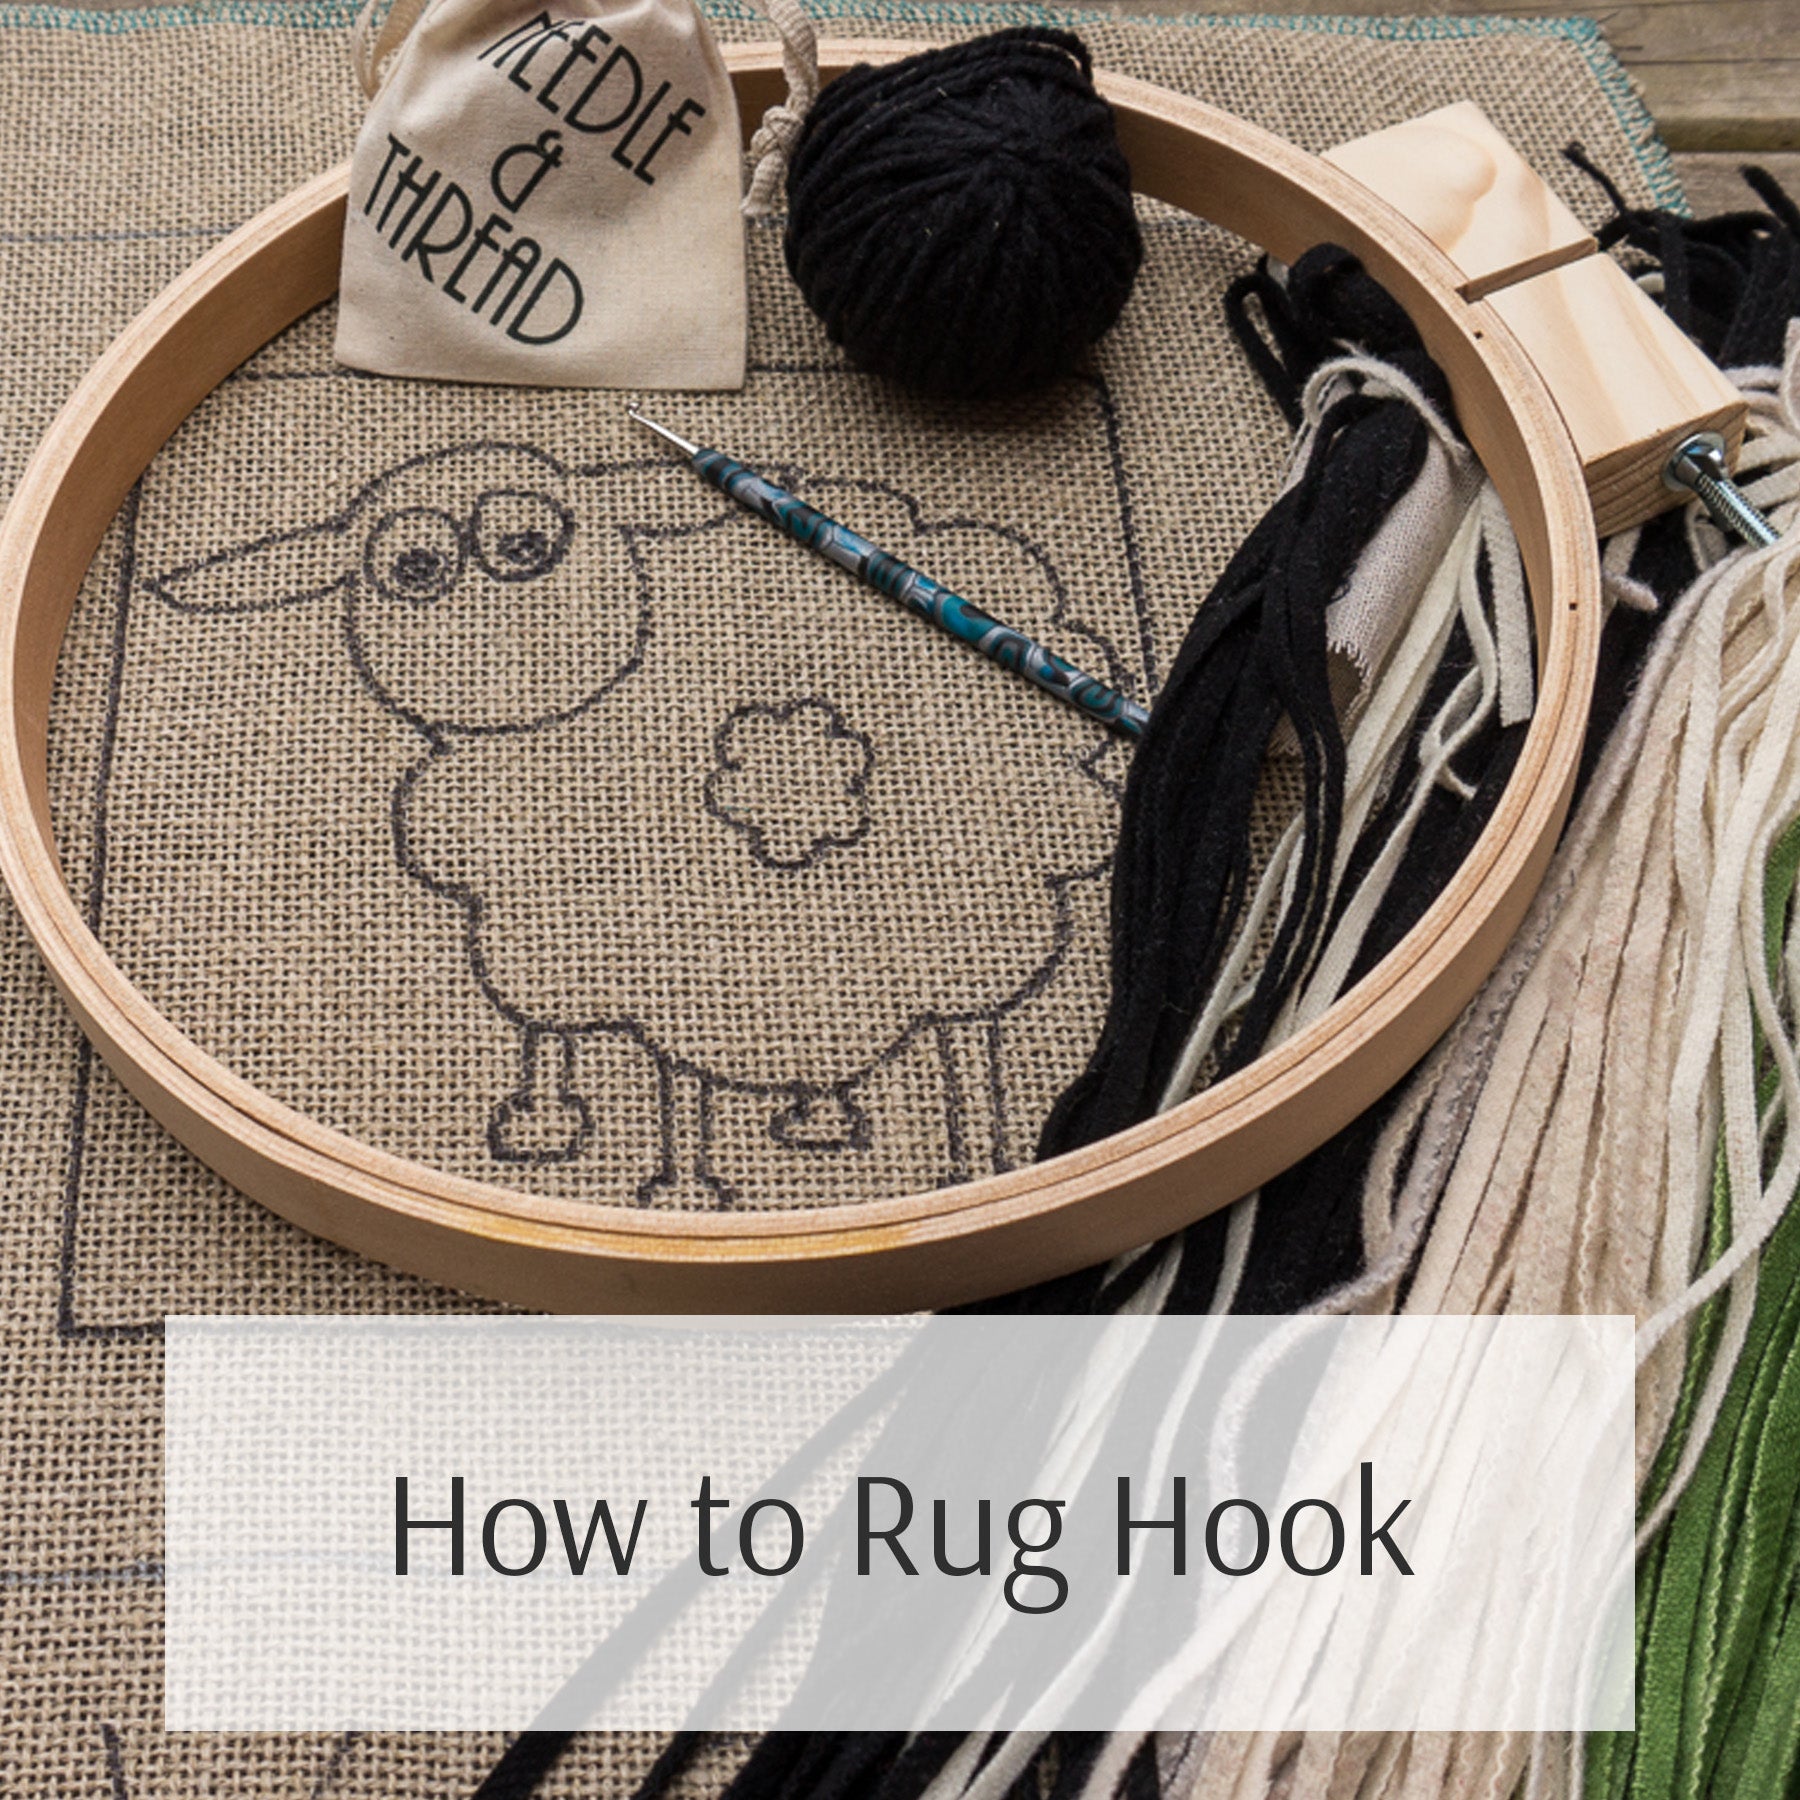
The first step will be to gather all the materials you'll need. If this is your first foray into rug hooking, one of the easiest ways is to borrow materials from a current hooker, or to purchase a kit. If they don't include the hook and hoop, you'll need to purchase them separately. One of the trickiest parts of starting this craft is getting strips of cut wool. Cutters can be costly, and cutting by hand is tedious and difficult to keep a straight line. There are wool strips available here websites that will sell cut strips, or be sure to purchase a kit with the wool already cut.
Here is exactly what you'll need to start a rug hooking project:
Backing (linen, burlap, monks cloth, rug warp)
Pattern drawn on backing (although not necessarily, you'll see here that beautiful pieces can be made without following a specific pattern and just selecting random pieces of wool).
Wool cut into strips
Hook
Hoop
Scissors
Something for finishing the rug (yarn and a darning needle, binding tape, cording)
Got it? Let's get started...

First, put the pattern in the hoop and pull it tight. When the backing is tight it's much easier to work with.

Pick a place to start. In this case I like to get the border done first. It's best to start somewhere along the line, not on a corner.
Holding the strip of wool in your left hand, catch the wool on the hook and pull it up through the backing. Bring the 'tail', or end of the strip all the way up. These will get cut off, so don't worry about how it looks.
Place your hook in the next hole (you won't need to hook in every hole, often you'll skip one or two, depending on the width of the wool you are using). Catch the wool and pull up a loop. You should try to bring the loop up higher than you want (say, about an inch), take your hook away, and pull the strip back down with your left hand to the desired height. What is the desired height? It all depends. A good rule of thumb is to have a height that is similar to the width of the wool. So if you were to hook with increasingly larger sizes of wool, you would bring the loop up higher.
If you accidentally pull out the first tail, just try again with a gentler hand this time. Also, try pushing the hook away from you as you pull it up to help with that issue.


Continue down the line, skipping a hole here and there depending on how closer they are together. You don't want the wool to be scrunched up against the previous, just touching lightly. It will take practice to get them all the same height, but don't worry too much - when the rug is done you will press it with an iron and even it out. At the end of the strip of wool, bring the last bit up to the top. The underside of the rug will lay flat, and the tails will be cut off.

Start the next piece of wool in the same hole of the last tail. Continue around the border in this way. When the border is finished there will be a number of tails sticking out the top of the rug. You can cut off the tails at any point (it's often easier to hook with no tails in the way). To cut off the tails, simply hold the tail or tails together and pull up from the backing slightly. Snip off the tails so what remains is at the same height as the loops.


With this pattern, there are no rules. Grab whatever color you want to start with, and you can hook line after line, or move around the pattern as you like. If you make a mistake, or don't like the color you picked, simply pull on the strip to remove and start again.

This is what it might look like if you move around the pattern:

And here's the back:

Nearly done! It looks a bit messy with all of the tails, you can cut them off at any time.

And here's the final piece with the tails cut off.

That's it!
A few tips as you go through this process:
If you hook a line next to another line and the space between the two seems too large, there are a few things you can do.
1. Pull out the strip and start again, in a closer row of backing.
2. Don't worry about it, but when you hook a line on the other side, crowd it a bit closer, it will even out.
3. At the end, if there are still spaces (you can see the backing from the front), hook a small piece of wool in between.
Sometimes I worry about how the piece will look while I'm hooking, and at the end they always look beautiful. Pay attention to color balance, but you could pull out any wool strips and hook them and this coaster would still look great, trust me!
Information on finishing the piece will be posted soon!