There are a lot of different ways to use lettering in a rug hooking or punch needle project. Over the years I've made welcome mats, mats with just one letter, mats with a last name, or a university name.
There are a number of ways to get the lettering accurately on your pattern. We'll chat about four of them:
Red Dot
Printing/Cutting
Projectors
*Inkjet Iron On Paper (Loopy's Favorite option)
Using red dot tracing paper is one option, whereby the lettering is printed off and traced onto the transfer paper (more on that here).
If you're really stuck and don't have transfer/tracing paper, you can print off the letters on a printer, cut them out, and trace directly around them on the backing. For a simple pattern like this letter rug, this can often be the easiest/cheapest option.
![]()
There are also mini or pocket projectors that can work well. These plug into a computer or laptop, and will project an image from the computer. Taping the backing on a board or to the wall, and projecting the image onto the backing, allows for the tracing of the image. This can take some practice, and it can be a little awkward to trace around the projected image.
The best way I've found to get perfect lettering is using an iron on transfer paper. A few years ago I found a great option - Transfer Artist Paper (TAP). This process will likely work for different printer transfer papers, but this is the best one I've found for working with linen backing. It's not cheap (about $2/sheet unless you can find it on sale), but can be worth it for complicated lettering.This can be found on Amazon and some local craft stores.
![]()
It's pretty simple to use, the main thing to remember is that the image has to be reversed for printing. It's possible to mirror text in standard word processing software, but often the text first needs to be inserted as an image. Once the image has been mirrored, print it on the transfer paper. It's best to use the highest quality settings in black and white when printing. These types of transfer paper work only with inkjet printers, not laser.
![]()
Cut around the text. While not completely necessary, cutting as close to the text will reduce the amount of paper that gets transferred to the backing.You want to leave a small white border around the lettering because there is a chance the black will bleed slightly.
![]()
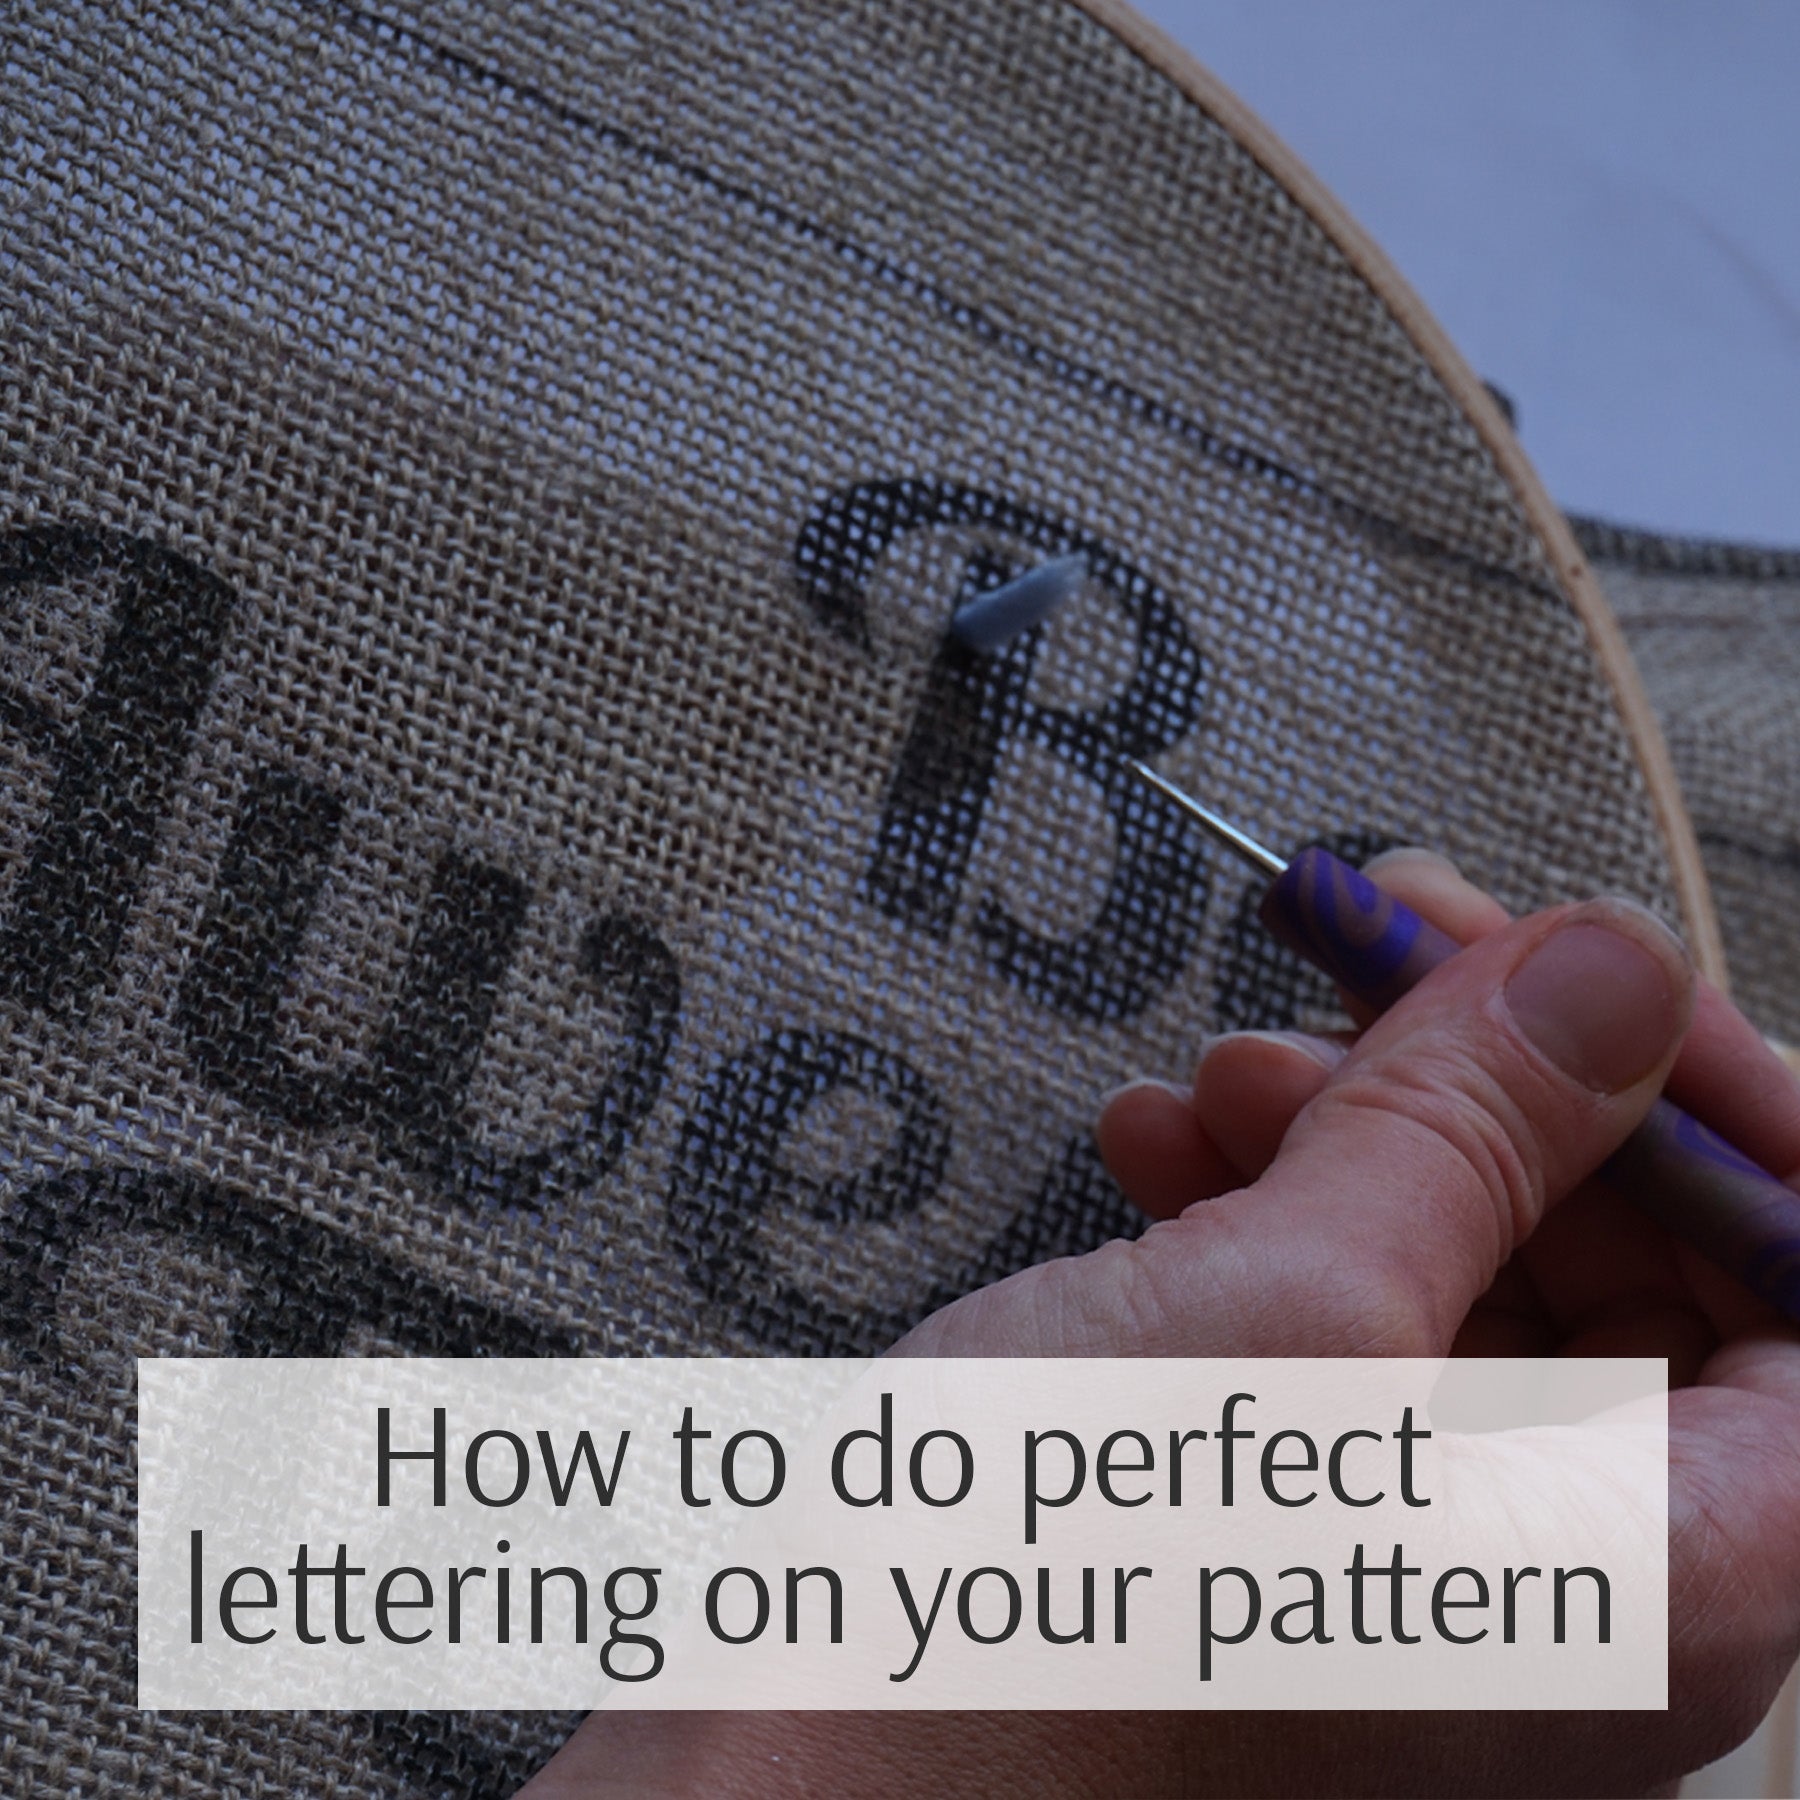
Using the highest heat setting on the iron without steam, place the image on the backing with the dotted side facing up/image side facing down. The amount of time/pressure/heat needed to transfer the image will depend on the iron, so follow the instructions with the transfer paper and there may be trial and error to get it right.
![]()
This one probably could have been ironed a little longer, but the text came out crisp enough to follow.
![]()
Here's the best part - you can hook right through the text. It's a great option for quite cursive or intricate text. It's easy to follow the outline exactly.
![]()
When hooking lettering it might be necessary to use different width strips to follow the text exactly.
![]()
Playing around with different fonts and designs is now easier with this option!
![]()
This option works for a variety of fonts.
![]()